Monday, 11 September 2017

Happy Halloween masking card featuring Pretty Pink Posh

Hi crafty friends!
Hope you all had a lovely weekend!
Pretty Pink Posh just released some amazing new products and I wanted to stop in today to share a card with you I created featuring one of them.
I used the new Trick or Treat Friends stamp set to create a one layered longer card.

Being a one layered card there's not a whole lot of supplies needed but there was a lot of masking!
When masking just remember to stamp the image you want in front first and go from there. So I started withe the vampire ears for my girly with pig tails, masked that and then stamped her, masked her off and then stamped Frankenstein, etc. I hope that makes sense!
You can purchase masking paper to do this, I simply stamp my images on printer paper, cut them out out and use temporary adhesive.


Once all my images were stamped out, I masked them all off to ink blend my background, I also put a piece of masking tape onto the bottom to mask the bottom part of as well. To create my background I blended Dusty Concord, Broken China and Mermaid Lagoon Distress inks and spritzed a little bit of water for the dot looking effect. Once my background was finished I removed all my masks and colored my images with Copic markers.
To stamp my sentiment, because the words are on top of each other and I wanted my sentiment going across, I simply just covered one word at a time with tape while stamping the other.
And that finishes my card today!

Thank you so much for stopping by!
If you haven't already be sure to check out the new release over at Pretty Pink Posh .

Supplies:


Wednesday, 6 September 2017

Sea Friends Shaker Card featuring Pretty Pink Posh

Hello!
Hope your having a lovely week so far!
I can't believe summer is almost over!
Thought I'd share another summery card before it ends!
I created a shaker card with the very cute Sea Friends stamp set by Pretty Pink Posh along with coordinating dies.
I used the frame from the Stitched Notes die to create my shaker from and filled it with Mermaid sequins. I did some ink smooshing with Distress inks onto watercolor paper for background.
At the bottom of my shaker I cut some 'waves' out of vellum using the Scallop Border dies.
For my cute sea characters I stamped them on watercolor cardstock, colored in with Zig real brush markers and cut out using the coordinating dies and adhered onto my card.


For my sentiment I used a shape also from the Stitched Notes dies, stamped my sentiment and adhered on!
That finishes my shaker card today!
Thank you ever so much for stopping in!

Supplies:


Thursday, 31 August 2017

Colored Pencils on Kraft Cardstock featuring Winnie and Walter

Hello!
Hope your having a good week so far!
I've been practicing my coloring with colored pencils so I thought I'd drop in quickly and share a card I created doing so.
One of my favorite looks in coloring on kraft colored card stock. So I decided to make a simple card doing that.

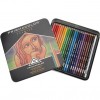
I created an A2 sized card base from Neenah Desert storm card stock. I stamped some very pretty flowers from the  Addies Garden stamp set from Winnie and Walter. I colored them in using Prisma colored pencils in several layers.
I stamped my sentiment in black from the Thoughtful Greeting stamp set from Pretty Pink Posh.
To give my card finishing touches, I added some Sparkling Clear confetti and some dash lines along the card with a white gel pen.

Supplies:


Monday, 28 August 2017

Flying by to say Happy Birthday featuring Pretty Pink Posh

Hi Crafty Friends!!
How are you doing today??
Stopping in to share a card with you today that I created using the Fly Away Friends stamp set from Pretty Pink Posh .
How cute is that little guy in the plane??

I started with my card base that I created using Sea glass card stock from SSS and stamped the stars cluster from the set in smoke ink over and over again to cover the background.
I used Fog card stock also from SSS as my main card panel. I used the clouds from the Fly a kite stamp set and adhered them onto my panel.

I stamped the plane and my cute little critter onto white card stock, colored in with Copic markers and cut out using the coordinating dies to adhere onto my creation.
I stamped the top part of the sentiment using smoke ink and stamped the bottom part onto a separate piece of card stock , cut into a banner shape and adhered underneath.


That's it for my creation today! I love the Fog color with the blue! I think it would make a super cute color combo for a baby boy card! I must keep that in mind!
Thank you so very much for stopping by today!!!


Supplies:

Fly Away Friends stamp set by Pretty Pink Posh
Fly Away Friends Coordinating dies
Fly a Kite stamp set by PPP
Fly a Kite coordinating dies

Thursday, 24 August 2017

CAS Fly Away Friends with Colored Pencils

Hello!
Hope your having a great day so far!
Stopping in with a super quick card today, featuring some coloring with colored pencils.
I still struggle with coloring with Prisma colored pencils so I just did some simple stamping to keep the focus on practicing my coloring so my explanation will be fairly quick for you😜.


I stamped my air balloons from the Fly Away Friends stamp set from Pretty Pink Posh.
I stamped my cute little hedgehog friend first and used a mask to cover him while stamping the balloon. I colored in all my images using Prisma colored pencils. I color in several layers, still trying to get the hang of it though!
I masked off my images to create a subtle cloud background which I did using a die cut cloud from the Fly a Kite coordinating dies and ink blending some soft blue ink over it, moving the cloud die as i went to fill the whole sky.
I stamped my sentiment and added some sparkling clear sequins to finish off my card!!

Supplies:


Monday, 21 August 2017

Hello Beautiful watercolor card featuring MFT's

Hello!!
I have a quick watercolor card I wanted to share with you using distress crayons.


I used a piece of watercolor card stock and literally just doodled some stripes of the crayons the paper and used a water brush with a generous amount of water to spread the color out, once I was happy with the look and it was dry I used the hello die in the Hello Beautiful die set from My Favorite Things closer to the top of the die. I die cut the beautiful die from peacock crd stock and adhered that under the hello portion.
I then adhered my panel onto a Neenah desert storm card base and that's it!
That finishes my card for today!
Super fast and simple, It's been a trend lately I realize😋

Supplies: