Wednesday 25 February 2015

Love You Fur-ever featuring The Greeting Farm

Hello again:)
Here to share this card I made with this adorable image from The Greeting Farm. I love this stamp set, the images are soo cute and I have so much fun coloring them in. I will be playing along with the Simon Says stamp, Monday challenge blog for the No Rules challenge today.

I colored the image on 120lb cardstock from Simon Says Stamp with Copic markers and cut out with a circle die. I cut a panel of Lavender cardstock and added some random ribbon underneath it, put the circle with the image on top and stamped the sentiment.I kept the design pretty simple but added some stitching around the edge to give it the finishing touch.


As always I'm so thankful for you stopping in to look at my card!

Supplies:
Furever stamp set by The Greeting Farm
Lavender cardstock by Simon Says Stamp
Versafine Onyx Black Ink

Copic Markers:
E00 E11 R20 E33 E55 E57 E31 E53 V06 C3 B0000

Monday 23 February 2015

Birthday Celebration featuring Lawn Fawn

Hello crafty friends!


Here today to play along with the Lawnscaping: Birthday challenge today.
I love birthday card challenges! It's of course the one card I need the most of  and yet never seem to have enough on hand when I need them.

I have two projects I made for this challenge to share with you today.
The first being a birthday card, I made this one for my niece, she won't be turning 5 for quite some time as she just turned 4 not so long ago but better to be ahead?
The second project is wrapping paper, I made stamping images on some blank kraft wrapping paper.


So I started by cutting a 5 out of some fog cardstock  using my Cricut, measuring 4 3/4. I then traced the 5 onto some white cardstock using a pencil so I knew where to stamp my images. After stamping the images , just remember to erase your pencil marks you traced, I  colored in my images with Copic markers. I then adhered the white cardstock behind my 5. I stamped the little confetti image with some crumb cake ink for a tone on tone look. Stamped my sentiment on white cardstock and cut into a banner,  added some stickles for some sparkle.


The wrapping paper I created by starting with a large piece of plain kraft wrapping paper, which I purchased from the dollar store, I like to have this around , I think stamping on blank wrapping paper or writing someones name on it is a nice way to personalize the gift, also it looks pretty:)
 I then stamped my images , using mainly Bake Be a Cake set from Lawn Fawn but also added in some of the confetti images and party hats from the Newtons Birthday Bash set from Newtons Nook. They actually kinda looked fun just in black but I decided to color them in using some colored pencils, also adding some different colored stickles to add a little extra. Now I made my paper first and then wrapped my gift but if your gift is solid enough, you could probably wrap it first, may save some unnecessary stamping and coloring.


I hope you enjoyed my projects today, they were fun to create!
Thank you so much for stopping by!!
Have a lovely day!!:)

Supplies
Stamp sets:
Bake me a Cake by Lawn Fawn
Critters in the Forrest by Lawn Fawn
Critters at the Dog Park by Lawn Fawn
Newton's Birthday Bash by Newton's Nook

Fog cardstock by Simon Says Stamp
Kraft wrapping paper from Dollaramma (local dollar store)
Diamond stickles
Silver stickles
Broken China stickles
Worn Lipstick stickles

Copic markers:

E53 E55 E57 E11 E00 RV04 RV02 V12 V06 C3 B97 B93 B00 B000 BV000 BV00 G00 G000 Y13 R32


Sunday 22 February 2015

Beachy,enjoy your day card featuring Newton's Nook

Hello!
Happy Sunday! Hope you all had a lovely weekend/enjoying whats left of it. 
I'm here to share a summery card with you! Think warm thoughts and the snow shall  disappear, right? I can dream:)

I will be playing along with Newton's Nook:
Just one Layer challenge. I love this challenge! I found it fun challenging myself not to add layers.

Inky Paws Challenge #18 - Just one Layer | Newton's Nook Designs
I will also be participating my card in the Simon Says Stamp : A Piece of Paradise challenge over at the Monday challenge blog. What a fun challenge. My piece of paradise would to be chilling on a beach right now like this kitty.

Ok, so my card consisted of a lot of masking. I started by stamping Newton and the sand pail on the cardstock and stamped these images on some scrap paper as well, cut them out and used temporary adhesive to mask these images off.
I masked the sky area off with some painters tape, sponged on some light blue ink using my ink blending tool. In order to get the look of the sand and water i just ripped some scrap paper to get a rough edge, I used this to mask the sand area to be able to sponge the water color on with darker blue ink and then flipped over the mask, leaving some white space, to sponge on the ink to create the sand area.
After removing my masks that were protecting my images , I then colored them using Copic markers and stamped my sentiment.


Thanks so much for stopping by!

Supplies:
Newton's Summer Vacation stamp set by Newton's Nook
Bashful Blue, Pool Party, Crumb Cake ink all by Stampin up
120lb base weight white cardstock from Simon Says Stamp

Copic Markers:
R32 R35 BV00 BV000 RV04 RV02 B00 B0000 R20 C3 E53 E55 E11 E00

Tuesday 17 February 2015

You're cool card featuring Newton's Nook

Hello!
Was hoping this would be my last winter themed card I'd be sharing for a while, not because I don't enjoy winter cards, they're stinkin cute, but because I'm not one to create winter cards when its all warm out and flowers are blooming, but there may be a few more winter cards in my future as this cold does not want to go away. Today is another -30 degree day, Ah! Ok, i'll stop whining about the cold now!:)

I will be playing along with the Simon Says Stamp Wednesday challenge blog for the All Creatures Great and Small challenge.
My little critters are from Newton's Nook. I stamped those cuties first and stamped them again on some scrap paper to be able to cut it out and use as a mask for when I stamped my ice berg. I again stamped the ice berg on scrap paper to be able to cut and use as a mask.Once everything was masked off I stamped and heat embossed my little snow flakes and used my ink blending tool to blend in some light blue ink in the background. I colored the images with colored pencils and covered the ice in wink of stella glitter which is very pretty in person but sadly doesn't photograph well.
I adhered on to a white card base and that's about it. I like the way it turned out, clean and simple but so cute!


Hope you enjoyed my card!! Thank you so much for stopping by!! 

Supplies:
Wild Child from Newton's Nook
Winter Pals from W plus 9 (ice)
Newton's Holiday Mischief from Newton's Nook (snowflakes)
Bashful Blue ink from Stampin up
Onyx black Versa Fine ink
Colored pencils by Artists Loft

Friday 13 February 2015

Monster Hugs Valentine cards for Simon Says Stamp:Red & Pink challenge.

Hello!
Hope everyone is having a lovely week so far and being crafty!:)
I have 2 Valentines cards to share with you today. My first one I will be playing along in the Simon Says Stamp Red & Pink challenge. The second I used the same stamp set, Monster hugs by Simon Says Stamp, such a fun set! The second doesn't really fit the the pink and red challenge but thought i'd share it anyways:)

For the first card:
I kept the layout pretty simple, using some random cardstock I had, and used a circle die cut to cut a circle out on the side. I adhered this piece on cotton candy card stock as the card base. I stamped my sentiment using the same cardstock and cut into a banner, I used the same circle die cut to create the curvy shape in order to line this piece up with my cricle. I colored that cute little guy with Copic markers, cut out and added to my card. Added some sequins and gems as the finishing touch.
Oh and I covered his eyes in glossy accents, which came out yellow?
Hmm I colored them blue, weird! Maybe just lighting:P

Supplies:
Monster Hugs stamp by Simon Says Stamp
Cotton candy cardstock by Simon Says
Patterned paper from Recollections
Memento tuxedo black ink
Sequins from Fancy Pants
Glossy accents by Ranger


I stamped my images on a tag I created out of white cardstock and colored with colored pencils.
The sentiment looks a little faded in the picture but it's because I covered it with wink of Stella glitter pen and it doesn't show up on the picture.
I used Schoolhouse red cardstock as my card base and stamped the background images with the same colored ink to give it a tone on tone look. I also lightly sprayed the background gold Perfect Pearls Mist to add some texture.


Supplies:
Monster Hugs stamp set by Simon Says Stamp
Schoolhouse red cardstock by Simon Says Stamp
Schoolhouse red ink by Simon Says Stamp
Heirloom Gold Perfect Pearls Mist
Memento Tuxedo black ink
Artists loft colored pencils

Thank you as always for stopping by!! Hope you have a lovely weekend and Valentine's day if you happen to celebrate. I am lucky to have a long weekend this weekend as Monday is holiday here in Ontario, I'm beyond excited to have the extra day, I'm hoping to get a lot of crafting in:)


Tuesday 10 February 2015

Happy Birthday card for Lawnscaping Clean & Simple challenge.

Hello again!
Here to share another card for the Lawnscaping clean and simple challenge.


I started with a white card base. I cut a small piece of patterned paper to use as the background. I stamped the little cupcakes from the Bake Me a Cake stamp set colored them in with Copic markers and cut them out and adhered on to of the background. Stamped the sentiment , added some twine and that's it. Very easy and simple card.


Thank you so much for stopping by!

Supplies:
Bake me a cake by Lawn Fawn
Memento tuxedo black ink
Wisteria wonder baker's twine by Stampin up

Copic markers:
G00 G000 V12 V06 BV00 E53 E33 R20 C3

Monday 9 February 2015

Love you card for The Card Concept: Romantic Roses Challenge

Hello & happy Monday! Hope you had a lovely weekend, and hopefully found some time to be creative!
I my self was not at all creative at all this weekend, my creative juices just weren't flowing. It's like writers block for crafters or something lol. Hopefully I will have better luck this week:)
With that being said though I do have a card to share with you, that I created last week for The Card concept: Romantic Roses Challenge.
I  struggle with which category my card would fit into for this challenge. I think it would best fit into the classy & elegant category.


I stamped the roses from Fifth avenue floral set by Stampin up and I colored them all using colored pencils. I always remembered when coloring as a child with my grandmother that she use to always shade in black and how pretty I thought it looked so I gave it a try with the flowers, turned out a little dark in some areas but over all I like the way it turned out.
The sentiment I created using two different stamp sets (will list below) that I cut out and popped up with some dimensional adhesive.
I added some lace I had hanging around and some twine to finish it off.  


Thank you so much for stopping by to look at my card!! Hope you have a good start to your week:)


Supplies:

Stamp sets:
Fifth Avenue Floral by Stampin up
Simply You by Technique Tuesday (You)
Pretty Patches: Christmas (Love)

Colore pencils by Artist's Loft (Michaels)
Crumb Cake ink by Stampin up
Memento Tuxedo Black ink


Thursday 5 February 2015

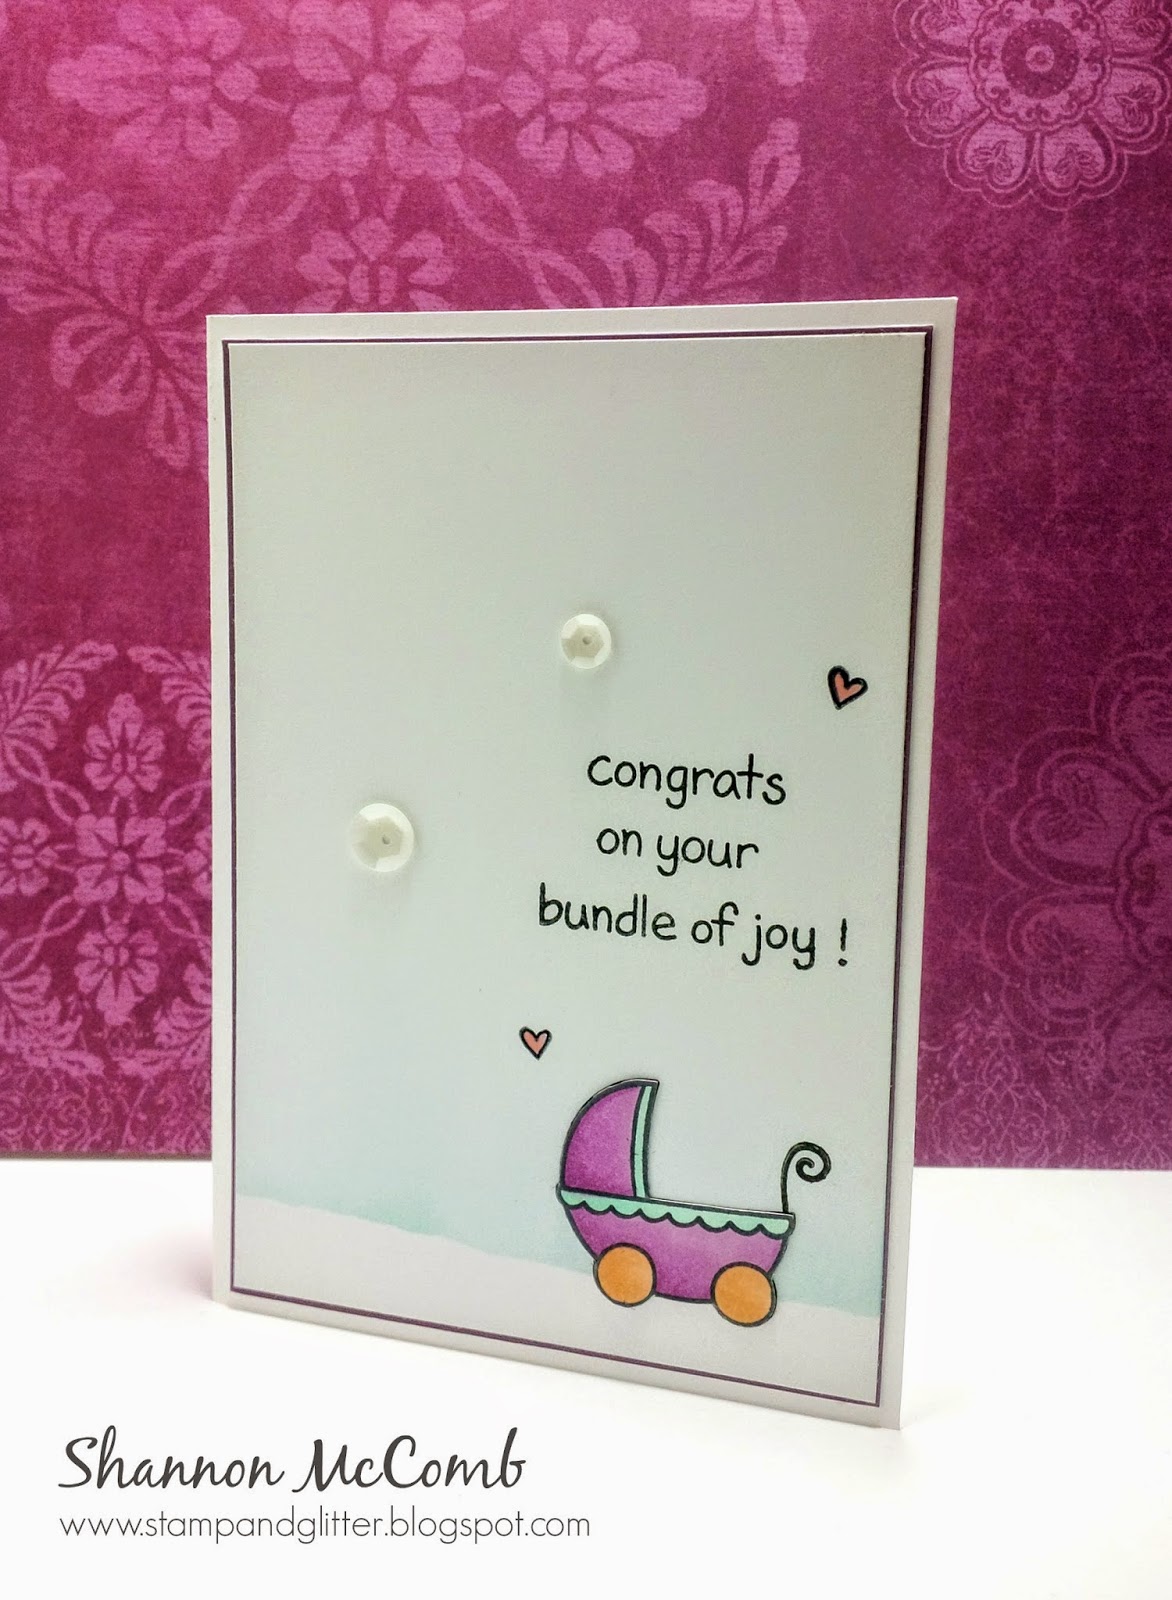
Congrats baby card for Lawnscaping Clean & Simple challenge

Hello all!:)
Here to share a card for The Lawnscaping : Clean & Simple Challenge today. Love this challenge! I think I was just babbling on how I enjoy clean and simple cards! I have made two cards for this challenge but I have one of them to share with you today and I shall come back later to share the other.:)

I started of with my white panel and gently tore a scrap piece of paper to use at the bottom for some masking. I temporary adhered it in place and sponged some blue ink just slightly up the cardstock. I stamped the stroller from the Plus One stamp set on a separate piece of cardstock, colored it with Copic markers, and cut it out. I did stamp the stroller directly on the panel as well to get the little handle piece, as I wasn't even going to attempt to fussy cut that part, and then adhered the cut out stroller lining up with the stamped image. I stamped the sentiment and some tiny hearts, added a couple sequins. I adhered the panel on some purple layering paper and adhered that onto a white card and that about sums up my simple card!


I like the way it turned out, It's not too purple so I could use it as a neutral baby card if I wanted too I think:)
Thank you so much for stopping by!

Supplies:
Plus one stamp set by Lawn Fawn
Aubergine layering papers by Hero Arts
120lb white cardstock by Simon Says Stamp
Bashful Blue ink by Stampin Up
Pool Party ink by Stampin up

Copic markers:
V12 V06 G000 G00 E53 R35

Wednesday 4 February 2015

You're grate card for Newton's Nook Use a Heart Shape challenge

Hello fellow crafters!
Hope you are having a lovely week hopefully being creative and crafty.
Here today to share another card for Newton's Nook; use a heart shape challenge.
Inky Paws Challenge #17 - Use a Heart Shape | Newton's Nook Designs
A very clean and easy card today. I think clean and simple cards may be one of my favorite styles of cards, not only to make but to look at of others creations, there's just something about them that catch my attention:)
So I just stamped the images from the Just Say Cheese stamp set from Newtons Nook in tuxedo black memento ink on white cardstock and colored in with colored pencils. I love coloring with my Copic markers but with smaller images i find it easier to color with pencils and blend out with a blender marker for colored pencils.
I stamped my sentiment and a little heart to the side and covered with wink of stella (sadly doesn't show in photo) and that's it! A really simple but cute card that can be used for Valentines day!


Thank you so very much for stopping by to look at my card! Enjoy the rest of your week!:)

Supplies:
Just say cheese stamp set by Newtons Nook
Colored pencil set by Artist's Loft
Tuxedo black Memento ink
Schoolhouse red by Simon Says Stamp
Wink of Stella clear glitter pen


Monday 2 February 2015

Birthday Farm Animals card featuring Simon Says Stamp

Hello! 
Here to share a Birthday card with you today. I love how fun this card turned out and how it can be used for a male or a female.
I used the Birthday Farm Animal stamp set and the Birthday Balloons stamp set both from Simon Says Stamp for this card.
 I will also be playing along today with the Simon Says Stamp Wednesday Challenge blog for the Anything goes challenge.
I started off with coloring the animals on a separate sheet, I used 120lb white cardstock from SSS for this and then cut them out individually. My intention was just to make a one layer card but I didn't like the placement of the animals so I just cut them out and fooled around with the design a bit. 
I stamped the stars as the background and just cut the square sort of as a frame for the animals just using my paper trimmer. I added the banner by just cutting out some triangles and added some twine.


Supplies

Stamp sets:

Cardstock:
Orange cardstock by Stampin up(sorry! cant remember the name of it)

Copic Markers:
Pig: R20, RV02, BV00, G000, G00, Chicken: Y11, Y13, B000, BG57, BG01
Goat: E55, E33, E31, B000, RV02, V12, V06

Thank you so much for stopping by to look at my card!