Thursday, 30 March 2017

For You CAS card featuring Paper Smooches

Hello!
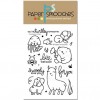
I have a quick CAS card to share today. For this card I once again used the adorable Courteous Cuties stamp set from Paper Smooches.

I started off with a panel from white card stock that I trimmed slightly smaller then an A2 card base. I die cut a hexagon on this panel from the Stitched Hexagon dies from PPP. On my white card base I ink blended some Lavender and Sea glass ink from SSS. 
For the critters I stamped them separately on watercolor paper and colored in with Zig real brush markers and fussy cut them out before adhering on my card. I stamped my sentiment from the same stamp set in the hexagon area and added some sequins from PPP to finish off my creation. 


That's it for my card today!! 
Hope you enjoyed, thank you so much for stopping in!!

Supplies:


Tuesday, 28 March 2017

Easter Theme Week for Pretty Pink Posh

Hello crafty  friends!
I'm on the Pretty Pink Posh blog today 
 to share an Easter card for Easter theme week!


For my card today I used the adorable new Easter Friends stamp set to create a cute shaker card.
To start my card off, I used a light blue A2 sized card based and stamped the patterned Easter eggs in the stamp set in the same colored ink all over for a tone on tone background. Moving on to the fun shaker area, I used the Scallop Circle die with some purple card stock to cut out my circle, I also die cut a piece of fun foam with a die to use as my dimension to create my shaker piece, however you can use foam adhesive, I just didn't feel like cutting it down into thin strips and I prefer that the fun foam is a little thinner. Once I had my acetate attached to my scallop circle along with my foam for dimension it's on to adding all the sequins and elements. I wanted to be able to see the background of my card through the shaker, which makes it a little trickier to add the elements without a backing, what I find easiest is to put something heavy on the card to hold it down and then place all the sequins and seed beads in a small area where you want the shaker piece and then adhere the shaker element right on top. For my shaker I used the Hydrangea beads, Lilac beads, Clear Confetti mix , 3mm Sparkling Clear sequins and I also added a few colored Easter eggs in there that I colored in with Copic markers and cut out using the coordinating dies from the stamp set.
I stamped my cute little Easter bunny and the rest of the images on white card stock, colored in with Copic markers and cut out again using the coordinating dies. I adhered my images onto my shaker element and stamped my sentiment to finish my card off!

That's it for my shaker card! 
I hope you enjoyed my Easter shaker card created with the adorable new Easter Friends stamp set.

Thank you so much for joining me today!

Thursday, 23 March 2017

Thanks Lovely featuring Concord and 9th

Hello!

Hope your all having a lovely day!
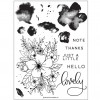
I have a floral card to share with you today featuring the Hello Lovely stamp set from Concord and 9th! It's such a springy stamp set! I could totally use some spring right now, its still super chilly here so I'm channeling spring in my cards! :)


I started my stamping the outline stamp of the flower on kraft card stock,along with the sentiments and trimmed of the end. I stamped the inside of the flower with Lavender ink from SSS and Mint ink from SSS for the leaves. Before adhering my kraft panel onto a white card base I stamped the 'lovely' sentiment on the white card base lining it up with the original sentiment so it gives the look of it hanging off.
I added a thin strip of silver sparkly paper onto the bottom and finished off with scattering some sequins from PPP.

Supplies:


Monday, 20 March 2017

CAS shaker card featuring Pretty Pink Posh

Hello again!
Hope you are all having a lovely start to your day so far!
I have a CAS but fun card to share with you today featuring some of the new products from the March release from Pretty Pink Posh.


I started off with an A2 white card panel and I used the small banner looking shape in the Stitched Notes die set and used the die as a guide on my paper to know where to space out the banner, I simply just made little pencil marks so I knew where to put the die. I then die cute the shape 4 times to create my banner shaker. I adhered acetate behind each cut out area and used fun foam as my dimension for the shaker element. I then filled with some seed beads!
I used Lilac, Petunia, Hydrangea and Daffodil.
I die cut some bows from the Twine and Bows die also from PPP to adhere onto the end of my banner.
My sentiment is from the Everyday Greeting stamp set! Love this new set, It was so many great sentiments for any occasion!

Well that's it for me today, I better go before my little lady wakes from her nap!
Thank you soo very much for stopping by!
Your comments always make me smile! :)

Supplies:


Friday, 17 March 2017

CAS Birthday card featuring Newtons Nook


Hi there!
Hope you all had a lovely week!

Stopping in with a quick CAS Birthday card today featuring Newton's Nook.

I will also be playing along with the Birthday theme Inky Paws challenge.


I used the Peekaboo Window dies from Pretty Pink Posh and the Newton's Birthday Bash stamp set from Newton's Nook.
I started with a white piece of card stock and used the flap die from the Peekaboo die set and die cut it out 3 times, flipping it around, so the flap will open in different directions.
I stamped my cute kitties on watercolor paper and colored in with Zig real brush markers and fussy cut them out and adhered them peeking out behind my windows. I trimmed a little off each end of my white panel , I then matted my main panel onto some polka dot patterned paper. To finish it off I stamped my sentiments on each side of the flap!

Thank you so much for stopping in!
I hope you have a lovely weekend!!


Monday, 13 March 2017

CAS Watercolor Birthday Card

Hello!!
I have another CAS creation to share with you today featuring the Watching Bloom stamp set, the same stamp set I used here. I try to make more then one creation with a stamp set while I have it out or when it first arrives otherwise I sometimes forget I have them :P

This creation would be another one that would  be super easy to mas produce. I started off with water color paper and stamped my image and sentiment in the left corner. I did some messy water coloring of the flowers with my Zig real brush markers and used the same colors with some water to create some splatter effects. I added a small strip of purple card stock and silver glitter paper onto the side and adhered my panel onto a top fold A2 card base.


That's it for my creation today!
Thank you so very much for popping in!


Supplies: